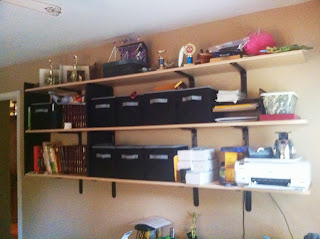
These three shelves provide space for books, memorabilia, gadgets, a printer, and the eight bins provide places for most of it to hide. We removed a bookshelf in his bedroom, providing more floor space for his new and improved desk.

Our daughter's room has four shelves. Let's just say that she has a lot more "treasures" that need a home.
Here are instructions for installing the shelves.
What you will need:
shelves
4 brackets per shelf - more or less depending on the amount of support you need
screws
stud finder
pencil
drill
level
white paint/brush - if you use white brackets and black screws - that's what we used!
Step 1: Find someone who is handy if you are not.
Step 2: Decide how far from the floor you want to begin and how far apart you want the shelves to be.
Step 3: Find the studs in the wall and mark them, then mark the height of each shelf.
Step 4: Install the brackets. Place the brackets where they go and mark them. Drill holes and then install the screws. It is very important to lay the shelf on the first installed bracket to make sure it is level before installing all of them. This requires two people.
Step 5: Lay the shelves on the brackets and attach with screws.
Step 6: Paint the screws if needed.
Add canvas bins, baskets, or other storage containers to create great storage in your child's bedroom.


No comments:
Post a Comment